1. Begin by signing into outreachbin.com.
2. Click on the campaign tab on the navigation header and click on the campaign list from the drop-down menu.
![]()
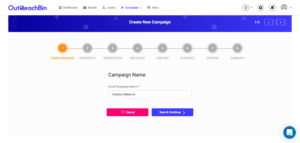
3. Click on the ‘Create New’ button.
![]()
4. Give your campaign a name and click on the ‘Save & Continue button.
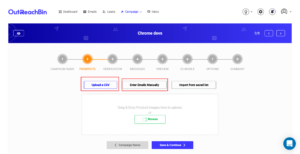
5. To add your prospect list, either click on the upload a CSV file button to upload the file or enter the emails manually.
You can also upload custom lists and directly import the list here by clicking on the “Imports from saved list button.”
6. Once you successfully upload your prospect list, you can verify them with outreachbin by clicking on the verify emails button.
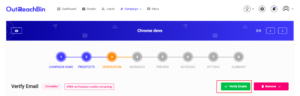
You can see our different verification credit plans here.
This step is completely optional but strongly recommended, as high bounce rates negatively impact your deliverability.
7. Once you’re ready to continue, click on the Message button.
8. To draft your campaign message, click on the email body.
i. To insert an image- click on the image icon in the message body and then upload your image.

ii. To insert your own custom variable- click on the insert custom variables button and choose any custom variable from the drop-down.
You can hyper-personalize each email by including a separate column of custom variables in your CSV for each prospect.
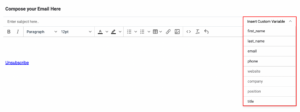
iii. To use source code (HTML), click on the tags icon and paste your source code.

iv. You can even A/B test with outreachbin to figure out which subject lines and email body works for you. For A/B testing, just click on the A/B testing button.

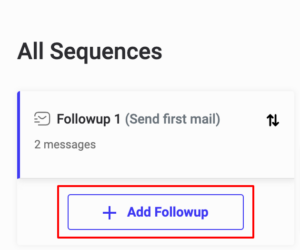
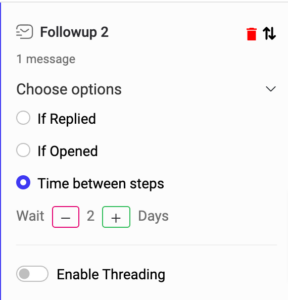
v. After drafting your first email, you can even add a follow-up message. To add a follow-up message, click on the follow-up message button and then set conditions based on the different results.
 .
. 
9. Once you have successfully drafted the email body, click on Save & Continue button to schedule your email. In the Max Reach, add the number of emails you want to send each day and slowly ramp up sending volume. (Please note that this is the number of emails per step that will be sent each day. Therefore, if you have 3 steps in your campaign and chose 10 for this option, you’ll actually be sending out 30 emails daily.)
You can even choose the time interval and the days you want to send your email.
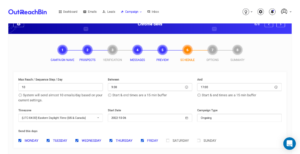
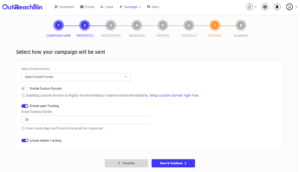
10. Under the Options step, select the email address from which you want to send your campaign emails in the drop-down menu.
Make sure you have enabled Open and Reply tracking to keep up with your campaign analytics.
11. Review your campaign settings in the next step and click on the Run it button to run your email campaign.